Unfortunately the design I chose from the Norah Waugh Book 'The Cut of Woman's Clothes' does not have any reference to where it is from. This meant that I did not know from what year or place the image came from.
After looking through my research i soon learnt that the garment was fashionable at around 1895.
I liked needing to research for this design rather than just copying a pattern from Arnold, J and feel that I have learnt a lot more for it.
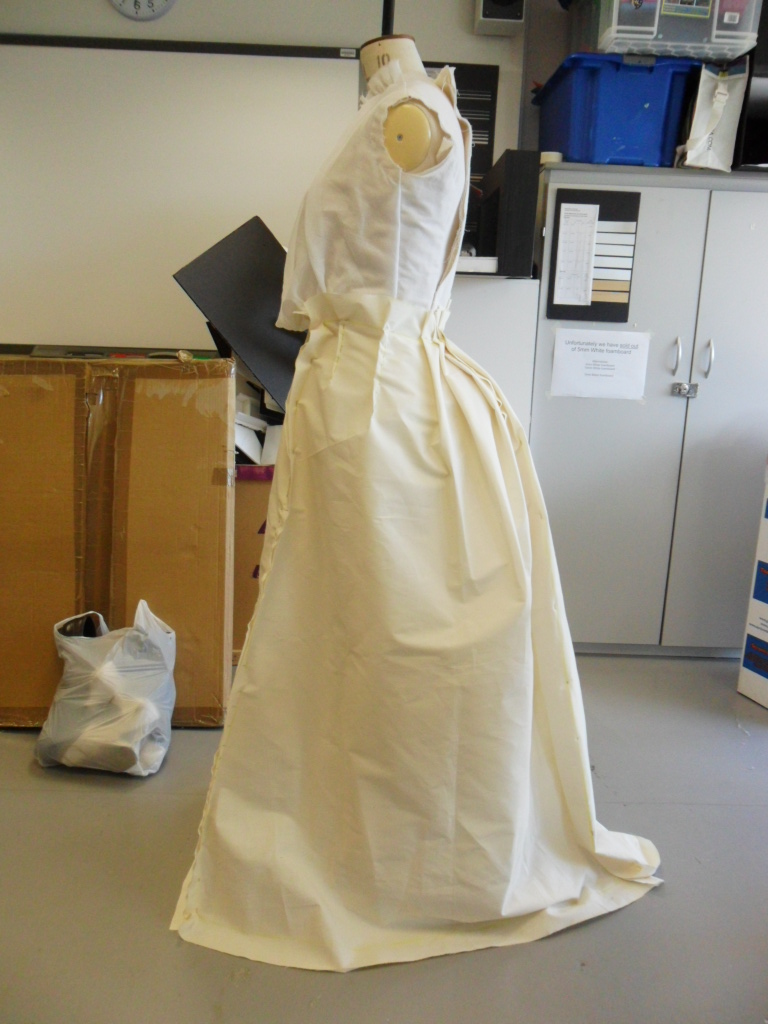
After draping the skirt of this costume I realised that I had placed pleats all around the centre back and darts down the side seams and wondered how I can make the skirt possible to get in and out. I first thought about the seam but this is down the side front and right in front of the eye.
I thought about any other way of allowing the skirt to get on and off with out needing to add another seam as I loved the way it all draped.
I then realized that maybe I could place the opening and placket just one side of the centre back underneath a box pleat that could then be poppered across.
However this idea looked a lot more clear in my mind and I had a great problem trying to organised a way of doing it. Finally I worked out the best way of putting the placket inside a box pleat.
This made me really happy and feel like such an achievement because I had worked out how to do it without any help.
If I was making this garment as a finished piece in top fabric I would place a few bones in both the blouse and the jacket seam allowance.
I feel I have learnt a lot from this design and hope to put it all to good use next year.
Showing posts with label SDP006 Design Two. Show all posts
Showing posts with label SDP006 Design Two. Show all posts
Monday, 16 May 2011

Tuesday, 10 May 2011
Finishing off the Garment: Design Two
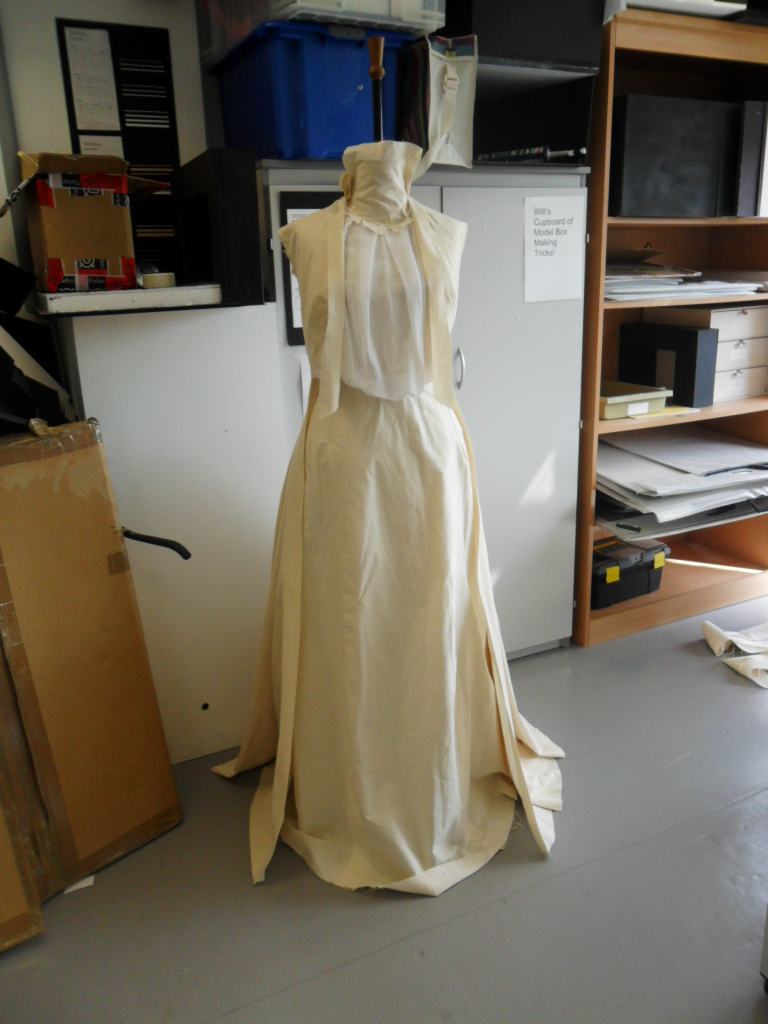
Please see images below of the finished fastening of the skirt that is all concealed behind a box pleat:


Please see images of the costume being finished:




Wednesday, 27 April 2011
Making the Jacket: Design Two
Please see images below of the draping and making of the jacket:
I found the draping of this really challenging. As I had not done anything like this before I honestly didn't have a clue where to start with the skirt of the jacket, as I wanted much volume in small panels of the body. I started with the jacket front until I could get some help of a tutor. Because after trying a few things I still didn't really know where to go with the skirt.


I am really happy with the way that the skirt drapes now.
Sunday, 17 April 2011
Making the Blouse and Skirt: Design Two
Please see images below of the making of the blouse and skirt:






Sunday, 10 April 2011
Draping the Blouse: Design Two
I decided to start by draping the skirt of the costume.
I used many images and patterns from Waugh, N. (1994) and Hunnisett, J. (1988) to create my own pattern for the skirt. I decided to drape the skirt with a front panel and a back panel that goes from the centre back to the side front. I placed two darts at the hip to create a nice smooth shape. I then created box pleats at the back of the skirt.

I then started draping the blouse of the costume.


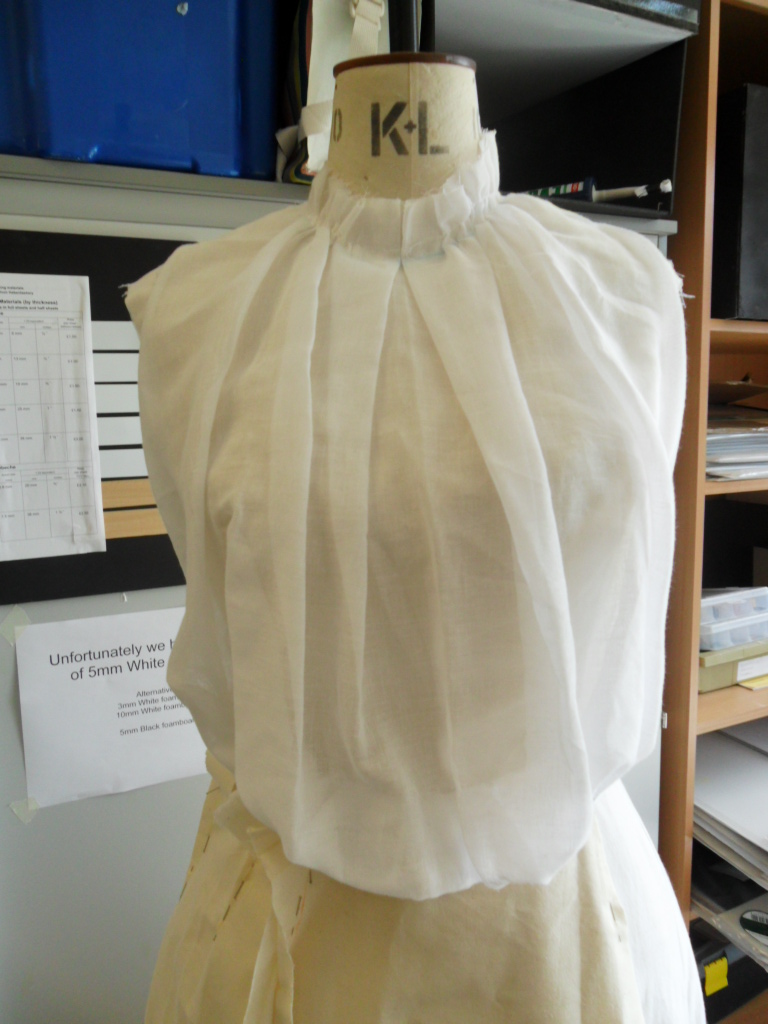
However I did not feel the pleats were working for this costume and decided to give gathering a try.
 I feel that this pleat is really effective once neatened up to create the detail seen on the design.
 I think that the draping looks much better.
 However after looking at the blouse at this angle I have decided that i want the length of the muslin to be much longer so that when gathered up into he blouse hem the stomach sticks out a lot more.


For patterns of both the blouse and skirt please see my work book.
I used many images and patterns from Waugh, N. (1994) and Hunnisett, J. (1988) to create my own pattern for the skirt. I decided to drape the skirt with a front panel and a back panel that goes from the centre back to the side front. I placed two darts at the hip to create a nice smooth shape. I then created box pleats at the back of the skirt.

I then started draping the blouse of the costume.
I started by draping a base of the blouse with a light weight pre washed calico. Placing darts down the front to keep it very fitted even though he top layer will not be fitted.
The pattern for this can be found in my work book.
Please see images below of draping the blouse:
I then started playing with the draping at the front of the blouse. First trying different pleating techniques.


I then created a diagonal box pleat to create this detail at the centre front seen on the design.


Here you can see the bottom layer of the blouse, this will be covered with a layer of muslin to the same pattern.
For patterns of both the blouse and skirt please see my work book.
Subscribe to:
Posts (Atom)