Wednesday 30 March 2011

Draping the Bodice: Design One


To get the silhuette that is required for this deisgn i would need various layers of petticoats, unfortonalty there are not a large variaty of simluar full body petticoats to creat this look. To get the needed silhuette that i required I deicded to pad the one petticoat out around the waistline to give this fullyness required. The cartrage pleats of the skirt will also make the dress fuller. 

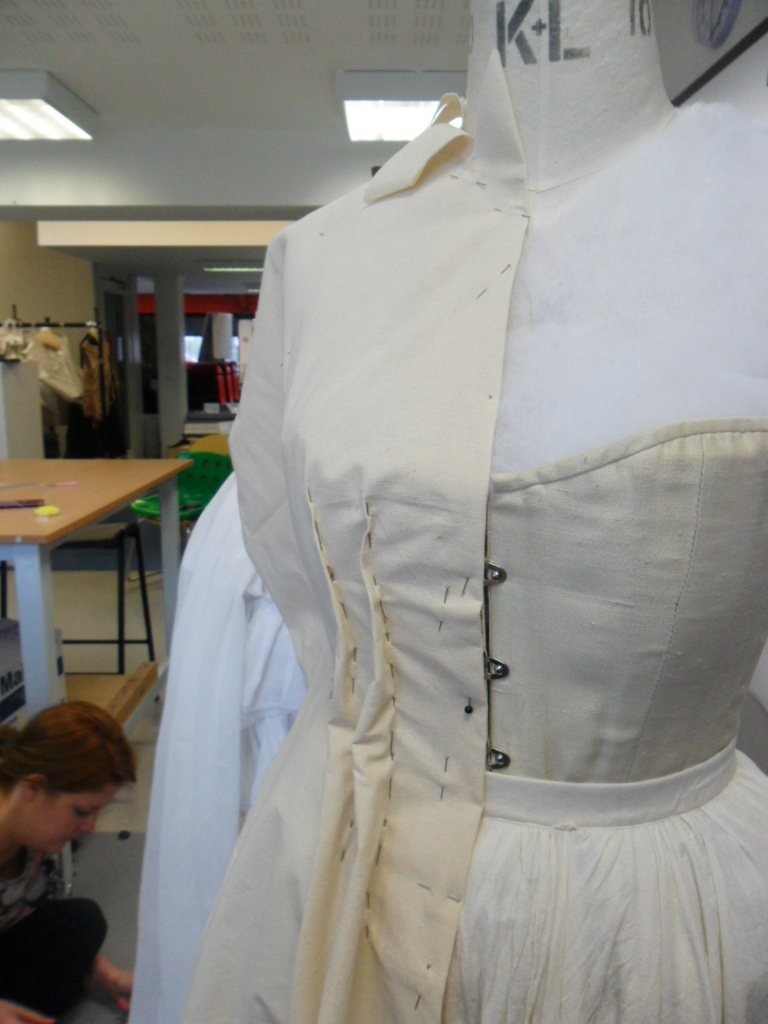
To start draping this design i followed the insturctions first taught to me at the start of this univsity year. I started with the CF of the bodice and have decided to work from there.
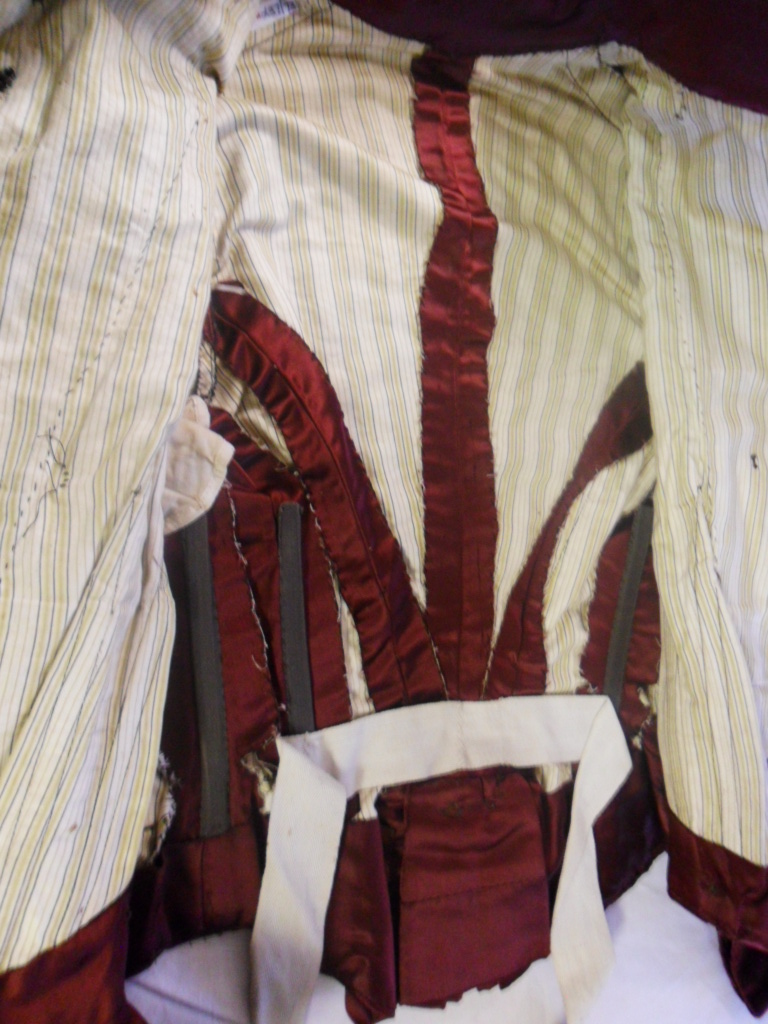
I constantly refeared to both my deisgn and the pattern that acompanys the deisgn in the Arnold, J. (2009) book. I have used the pattern in the Arnold, J. (2009) books as a guide more than something to copy because the pattern is Arnold's interpritation of how the origional dress will have been cut by taking needed measurments of the origional dress.

My body figure and the figure of women today is very different to that of women in 1830-40.


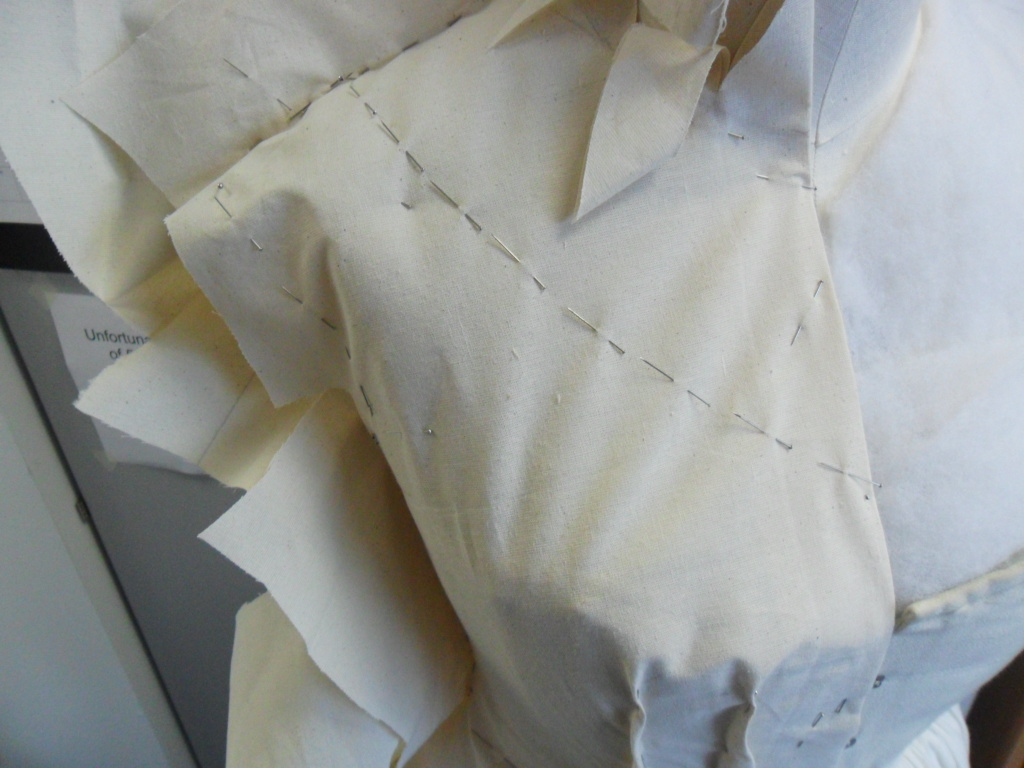
 I have marked out potenal design lines with pins so that i can look at the bodice as a finished product before drawing all over the calico so that it is kept as neat as possible.


 On the pattern that I have been refearing too it states that the side pannal has been cut on the bias, this is different to the way I have been taught at University. I decided that this might have been a technique used back in the 19th century and decided to keep with the way i have been taught and cut the side pannal on the straight of grain to match the center front and center back, because i could not think why the side pannal would need a extra stretch within the fabric when it is placed over the top of a very hard and fitted corset.


After playing with the calico I marked up all the seams, design lines and darts, took the calico off the mannique and made a pattern of this. 

The patterns made from this cutting on the stand bodice can be seen in my workbook.

Preparing the Mannique

I have decided to get a smaller size mannique and pad it out so that when a corset is placed over the top of the mannique it will still create a smoth hour glass shape rather than a very hard and straight  body that the mannique has. 

 I found a corset that fitting myself and took measurments to transfear this to my manniqune so that I was working to a human shape rather than just a mannique. This means that i can check thinks such as armholes and sleeves fit onto a natural body shape.

Time Line

This is the time line that I have drawn based on my research:


I have found this really useful for learning all the different silhuettes and changes thoughout the 19th Century. I am very keen in my own time to create a time line of the other Centurys for my own personal use to firstly learn all the Centurys in more detail and to have a piece of very useful document that can allow me to cross referance a dress to calculate a possible date down to the last 5 years.

Tuesday 29 March 2011

Design Two

The Second Design that I will be cutting is:

 Waugh, N. (1994)

I have chosen to use this design for the second part of my cutting project because I believed that it would be a great challenge as there is no pattern for the drawing. When doing this project i wanted to work on my skills of being given a design from a designer and then use my own research to create a perfect 3D replica of the 2D design. 


Because I will need to mainly be working with different patterns I need to do a lot of advanced research to help me cut my costume. 

It was discussed about how I could create the overall look. Whether I should create a fashion garment or a costume garment. For example if I create a costume garment then I would create the blouse as a false front so that there is less clothing to be taken on and off for quick changes. This would be great to teach myself how to create a false front bodice, however if I do this then I would not know how to create it as a fashion garment. 


My tutor suggested that i create it as a fashion garment so that I learn all the cutting and makings skills of how to make the whole costume and then can learn to fake the front at a later date.

Design One

The first design  I will be working on is: 


Arnold, J. (2009).


I have chosen this design as my first cutting on the stand project piece because it has a very simple but elligant cut to the bodice. This means that it will be a slight challange to ensure that the pieces of the bodice have a smooth sharp curve like the one seen on the line drawing but the pieces will be simple to drape onto the stand with the grain of the fabric in the correct dirrection.

Saturday 19 March 2011

Origional Work Plan

I have created a basic and a detailed work plan to help myself stay on top of this project and ensure that i get evderything finished to a great standard. There is a copy of both work plans in my workbook if a paper copy is easier to look at.

Please see below my work plan. 

Please see below my detailed work plan:

Thursday 17 March 2011

Tutorial

After my first meeting about the project I have been given the opportunity to go on a great work placement. This means that I will be finishing the unit earlier. With this in place as well as still presently working as a Supervisor for the AUCB production of 'Candide' and needing to write a essay for the POP unit i felt very worried about the work load that my tutor seemed to expect from me. 

I went to see the head of my year group to talk about work load and my concern. It was then organized that I will cut half a bodice with a quarter of a skirt to a toile standard from 1835-1849 and then cut half a bodice and a full skirt to a high standard toile from 1890's. I will also still be making a pair of breeches for the National Theatre Hire Department. 

I feel a lot more confident with my work load after this meeting.

Monday 14 March 2011

Choosing My Final Designs

After placing all my research from the 19th Century into my workbook I decided to look though all the research and select a small selection of different designs to show to my tutour today. 

Here are some images of the dresses that where potential designs:

 Ashelford, J. (2008)
 Waugh, N. (1994).
 Gibbs-Smith, C. (1969)
Taschen. (2002)

It was decided to cut half of the dresses from Waugh, N. (1994). and Gibbs-Smith, C. (1969) as well as two designs that are featured later in this blog. The Waugh, N. (1994) dress featured on this post would be created to a very high standard and detail such as the lace would be represented by lazer cutting calico into a decorative design. 

Saturday 12 March 2011

AUCB Costume Store

Emily, Jen and I went to the AUCB Costume Store to look at all the undergarments that are available for us to use. We felt that this would be important as there would be no point in deciding on a design to recreate if there was no under structure to support the design.

Looking though these undergarments might help me decide what designs will be the best ones to choose.

Here are some images of the different styles of 19th Century underwear we could find. 


There are a few different size corsets but unfortunatly they are all a quite modern cut. I think that this will not be a problem though because as long as the best fitted corset it found then the garment should drape very well as the corset will still take the woman in at the waist and hips.


There are also bum pads, hip buckets, and frills available and a few more petticoats if needed to padd the mannique slightly more. 

Unfortunatly in terms of understructor  of the skirt there is a very limited suply but looking though them all has helped me to decide on a deisgn that will work with the items i have.

Friday 11 March 2011

Hampshire County Museum Services Costume Collection in Winchester

Again the 19th Century Cutting on the Stand project have been very privaliged to be able to go to the Hampshire County Museum Services Costume Collection in Winchester. The Curator had taken out various items for us to look though including dresses from mid to late 19th century, corsets, crins and bodices.The Curator also went off to get us different books to look though which she recomended. The Curator was very helpful and answered all our questions with alot of care for the subject.

I learnt about all the different types of corsets and bodices. And learnt about various interesting facts. For example while looking though the MODiP we found that a bodice had a cut in the button stand. We were unsure if maybe this was because the garment had been riped. I asked the Curator about this when a bodice came out that also had this small cut at the front of the button stand. She said that the reason behind this small cut is for a pocket watch on a chain.


Please see below for a selection of images from my visit.
This early 1830's corset was really interesting because i did not think that they looked this simple.


Looking at different crinolines was really interesting to see how different types can create such different silhouettes.


This was really interesting becuase the dress is so well and carfully made by both hand and machine stitches but the buttons have been sewn on so badly.


I learnt so much from this showing of the collection and found it really interesting not just for my studies but in my fascination of history and costumes.